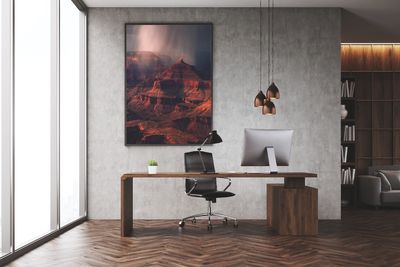
Sale on canvas prints! Use code ABCXYZ at checkout for a special discount!

By: Abbie, Photographer and Shop Owner
Are you the person that’s been put in charge of ordering wall art for your entire office? Congratulations on being such a valuable piece of your company! Wall art will considerably change up your space and bring more productivity, inspiration, happiness, and peace of mind to you and your staff. While this may seem like a daunting task, let’s break it down into manageable steps to make the entire process quick and easy so that you can get to enjoying your new office views with minimal effort.
Step 1: Measure Your Space(s)
Get a retractable measuring tape and measure the open space of the walls that you would like to put prints on. This will give you the area that you’ll have to work with for one or multiple prints/frames. Wall art should take up 60 to 75% of the available wall space, meaning wall space that isn’t covered by furniture or moldings. Start by measuring the height and width of your wall, then multiply them by both 0.60 and 0.75 - this will give you the range of print sizes that will suit your space. Example: Say you have a wall that is 50 inches tall, and 80 inches wide. You'd multiply 50 x 0.6 and 80 x 0.75, which gives you 30x60 - this is your ideal print or frame size! Pretty easy, right?
Is your piece going over a sofa or piece of furniture? When hanging wall art over furniture, it should be between 2/3 to 3/4 of the width of the furniture. You can do a similar calculation here for measuring the ideal print/frame size. Example: Say you're going to put something on the wall above your office sofa, and the sofa is 60 inches wide. Simply multiply 60 by 0.6 and 0.75. Thus, a print or frame around 36x45" would fit beautifully above the couch. If your calculations produce an exact size that isn't available in the shop, you can round up or down to the nearest size.
Tip: If this is your first rodeo, it’s a great idea to put up some blue painter’s tape in rectangular dimensions to see what this magical equation looks like on your wall. Visuals help! A good rule of thumb for how high or low to place your artwork on the wall is this - The center of the print should be at eye level when standing and looking at it. If you’re unsure about the size to pick, bigger is usually better. It’s not very common for a print to be “too big” for a wall, but a print that is too small will be drowned out by the empty space surrounding it. When in doubt, pick the bigger size. I've personally found that 16x20s work best on small wall spaces next to a desk, and 24x36s or 30x40s are best for standalone pieces on a big wall by themselves.
Step 2: Choose the Medium
Now that you have the dimensions that will work for your space, it’s time to pick the type of print(s) you’d like to hang in your space. Do you want stretched canvas? A framed print with glass and a mat? A modern-feeling metal print? There are multiple options available, and they can easily be seen and selected by clicking on the “Wall Art” button on the top right side of any image page. It’s a good idea to stick with one type of medium when outfitting an office space with multiple images, for consistency and flow. Not sure which medium would be best for your particular space? Feel free to email me at [email protected] with some pictures of your space, and I’d be happy to help you narrow down choices and come up with something eye-catching and complimentary to your specific space.
Step 3: Time to Browse
Time to let the staff in on the fun - you can send out a staff-wide email with a link to my site, and tell them to browse the images to find one they would enjoy. Many offices allow their staff to choose a photo of their own personal taste (they’re the ones who’ll be looking at it most often, after all), but you can also guide them to shop within a theme. Example: If you’re working at a bank in Phoenix, you can tell your staff to browse the “Arizona” or “American Southwest” collections on my site so that they all pick something with a desert theme. Once they choose their image, tell them to just email you back with the link to it.
Step 4: Checkout
Visit your staff-picked links, select the size and medium, add all of your selections to your cart, and go through checkout. Voila! Your images will be printed by one of the best labs in the country (Fine Art America), and safely shipped directly to your office, ready to hang. You did it! Now, kick back and enjoy a cup of coffee while awaiting the praise and compliments that will inevitably flow your way from your revitalized workspace (Employee of the Month mug not included, but you definitely deserve one).